Travel around the world

Adobe Creek Homeowners Association, water leak report 02/25/2024

Adobe Creek Homeowners Association - Community Management Services
278 Monroe Dr. Mountain View CA 94040

The story

On February 25, 2024, at 4 p.m., we observed water on the first floor of our property. The water came from our adjacent Unit #18. With the help of another neighbour from Unit #17, we shut off the main water valve for Unit #18 to stop the water flow. The Unit #18 was under remodeling at that time, and the valves were closed because of work on the water pipes inside the unit. Someone from HOA garden workers opened public valve for Unit #18 causing the flooding in the unit that spreaded to the adjacent units.
We received permission from the owner of the the Unit#18 to gain access inside. I shut off the electrical breakers.

Read more ...

How to Create and enforce Github branch protection rules for Organization. Best Practice

git branches

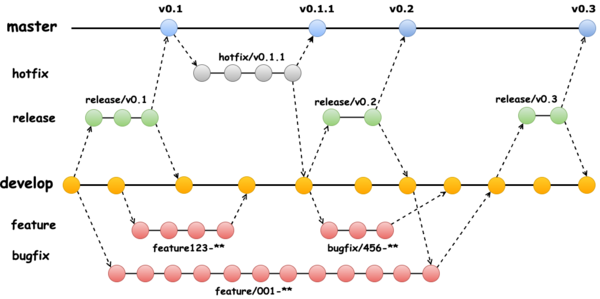
We are going to enforce the Git Best Practice branch's protection rules and recommendaions for GitHub Organization repositories.

Also we will automate a proces of adding and updating teams and branch protection rules to GitHub Organization repository.

There is the same way to apply branch protection and recommendaions to private (non-organization GitHub repositories but you need to modify the automation scipts). Also some options are not available for non-organization GitHub repositories.


Read more ...

Joshua Tree National park.

Национальный парк Joshua TreeAnd once again, we make our journrey with friends, to Joshua Tree National Park

We make our way down here every year, on the last weekend of May, so that we can experience the desert heat, rock climb on real rocks, take some time away from work, and spend our time with good people. On this trip, our whole family came, along with Boris, Natasha, Yulia, Victor Zybin, Kirk + Caren, Gina + Steven, Mónica + Nuno, Brian, Maya + Steve (this is so I don't forget). 
What is Joshua Tree National Park? This is a part of the top of the Mojave Desert - a plateau resting at 1200 meters above sea level, with the temperature lower by 5-10 C, than in the lower part of Mojave Desert. 

What is the Mojave Desert. It is a small desert in North America, where many Hollywood movies were filmed. So, if you see a Hollywood movie with a desert, moon, The Martian - then it was in the Mojave Desert, since Los Angeles and Hollywood are only a one hour drive away. Top Gun was also filmed here. 

Read more ...

На одном из интервью была поставленна задача построить тестовую лабораторию сосотоящую из Ubuntu Desktop, Ubuntu Server Router и Ubuntu WEB Server с использованием виртуальных машин в VirtualBox на одном физическом хосте. 

Router имел три интерфейса (первый NAT на хост) и разделял две виртуальные подсети. В первую сеть на нем должен работать DNS server для обслуживания зоны "testzone.home", NAT и DHCP сервер. 

Desktop имел два интерфейса (первый NAT на хост) получает IP динамически и получает доступ к "www.testzone.home" на WEB server. Вторым интерфейсоам Router смотрит в подсеть 2 и на WEB serevr. 

На WEB server имеющем два интерфейса (первый NAT на хост) установлен NGINX, MySQL, PHP и Wordpress "www.testzone.home". 

К WEB server подключен внешний диск который монтируется при старте хоста. Каждые три часа база данных Wordpress, системные файлы /etc/, /home/ и папки с файлами Wordpress архивируется в примонтированный раздел. Архивы хранятся месяц после чего удаляются. 

Реализация

Скачиваем ISO имиджи Ubuntu Desktop & Server 14.04 с официального сайта. Скачиваем и устанавливаем VirtualBox с официального сайта Oracle. Создаем три виртуальные машины (два Servers и один Desktop) с Bridge interfaces на первом сетевом интерфейсе. Стартуем и инсталируем Ubuntu. UserID - ubuntu, password - ubuntu. В процессе инсталяции выбираем инсталировать только OpenSSH server. Начнем настройку тестовой лаборатории с сервера. 

Server

Login на сервер с UserID/password - ubuntu/ubuntu. 
Набираем:
ifconfig
получаем IP NAT интерфейса. В моем случае 192.168.0.25.
Выключаем Server.
sudo halt -p
Активируем второй интерфейс для виртуальной машины как "Internal Network" в свойствах.
Так же добавляем еще один SATA диск фиксированным размером 1GB. Стартуем Server VM.
Mount a new partition. Включаем сервер, логинимся.
sudo nano /etc/network/interfaces
auto eth1
iface eth1 inet static
	address 10.10.0.1
	netmask 255.255.255.0
и сохраняем файл.
dmesg | grep eth
lshw -C network
ifconfig eth1 down
ifconfig eth1 up
ifconfig
Должен нам показать два активных интерфейса.
Все делаем как здесь написано. Устанавливаем NGINIX, MySQL, PHP и phpmyadmin
Подключаем (монтируем) дополнительный раздел. 
sudo fdisk -l

sudo cp /etc/fstab /etc/fstab.old

sudo fdisk /dev/sdb

then type o press enter # creates a new table

then type n press enter # creates a new partition

then type p press enter # makes a primary partition.

then type 1 press enter # creates it as the 1st partition

finally type w #this will right any changes to disk.

Okay now you have a partition, now you need a filesystem.

sudo mkfs.ext4 /dev/sdb1

sudo fdisk -l

sudo nano /etc/fstab

#device      mountpoint            fstype  options     dump fsck
/dev/sdb1    /home/ubuntu/backup   ext4    defaults    0    0
reboot
Архивируем базы данных и папку с системными файлами. Создаем файл /home/ubuntu/backup.sh
nano /home/ubuntu/backup.sh
копируем в файл
#!/bin/bash
#START
DB_BACKUP="/home/ubuntu/backup"
DB_USER="root"
DB_PASSWD="password" #password to SQL
FILE="/etc-files-`date +%Y-%m-%d-%H-%M-%S`.gz"

# Remove backups older than 30 days
find $DB_BACKUP -type f -mtime +30 -exec rm -rf {} \;

# Backup each database on the system and sys files
mysqldump -u $DB_USER -p$DB_PASSWD --all-databases > $DB_BACKUP"/`date +%Y-%m-%d-%H-%M-%S`.sql"
tar -cpzf $DB_BACKUP/$FILE -C / etc/

#END
создаем правило для cron
sudo su
crontab -e
добавляем правило. Сохроняем crontab - Ctrl+X и Y
*/30 * * * * /bin/bash /home/ubuntu/backup.sh
и делаем файл исполняемым.
chmod +x /home/ubuntu/backup.sh
Сервер готов.

Router

*/30 * * * * /bin/bash /home/ubuntu/backup.sh